Installing a band heater on a cylindrical object is a task that requires precision and knowledge. As a band heater supplier, I've seen firsthand how a well - installed band heater can significantly improve the performance and efficiency of various industrial processes. In this blog, I'll guide you through the step - by - step process of installing a band heater on a cylindrical object, ensuring that you get the most out of your equipment.
Understanding Band Heaters
Before we dive into the installation process, it's important to understand what band heaters are and why they are so useful. Band heaters are a type of electric heater designed to wrap around cylindrical objects such as barrels, pipes, and nozzles. They provide uniform heat distribution, which is crucial for applications like plastic extrusion, injection molding, and blow molding.
We offer a wide range of band heaters to suit different needs. For instance, our Blow Molding Barrels Electric Band Heater is specifically designed for blow molding processes, providing reliable and efficient heat transfer. Our Ceramic Band Heater For Plastic Extruders is made with high - quality ceramic materials, offering excellent insulation and rapid heat response. The Stainless Steel Ceramic Heating Band is durable and corrosion - resistant, ideal for harsh industrial environments. The Injection Mold Heater ensures precise temperature control during the injection molding process, and the Blow Moulding Machine Heater Band is tailored for blow molding machines, optimizing the heating performance.
Step 1: Prepare the Necessary Tools and Materials
The first step in installing a band heater is to gather all the required tools and materials. You'll need a set of wrenches, a screwdriver, electrical tape, a multimeter, and of course, the band heater itself. Make sure the band heater is the correct size for the cylindrical object. Measure the diameter of the cylinder accurately and choose a band heater with the corresponding inner diameter.
Step 2: Inspect the Cylindrical Object
Before installing the band heater, inspect the surface of the cylindrical object. Ensure that it is clean, smooth, and free of any debris, rust, or scratches. Any imperfections on the surface can lead to uneven heat transfer and may damage the band heater over time. Use a clean cloth to wipe the surface and remove any dust or dirt.

Step 3: Prepare the Band Heater
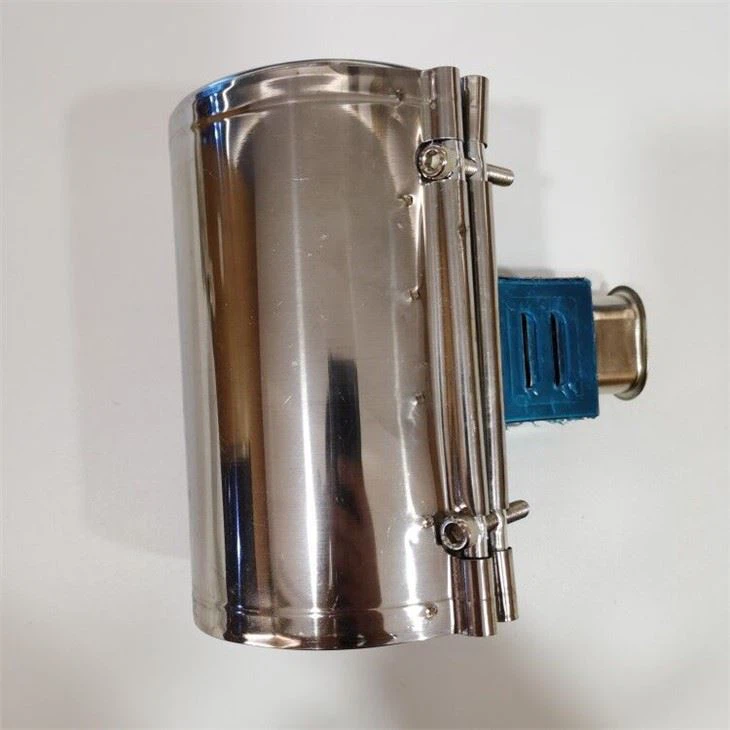
Unpack the band heater and carefully inspect it for any signs of damage during shipping. Check the electrical connections, terminals, and the heating element. If you notice any issues, contact our customer support immediately. Next, determine the correct orientation of the band heater. Most band heaters have markings indicating the top, bottom, and the direction of the electrical leads.
Step 4: Position the Band Heater
Carefully place the band heater around the cylindrical object. Make sure it is centered and evenly tightened. If the band heater has a split design, align the two halves carefully and ensure that they fit snugly together. You can use the wrenches to tighten the clamping bolts or fasteners. However, be careful not to overtighten, as this can damage the band heater or the cylindrical object.
Step 5: Make the Electrical Connections
This is a critical step that requires careful attention. First, ensure that the power supply is turned off to avoid any electrical hazards. Use the multimeter to check the resistance of the heating element to make sure it is within the specified range. Then, connect the electrical leads of the band heater to the appropriate power source. Follow the wiring diagram provided with the band heater. Make sure to use proper connectors and secure the connections with electrical tape.
Step 6: Test the Band Heater
Once the electrical connections are made, turn on the power supply and activate the band heater. Use a temperature sensor to monitor the temperature of the cylindrical object and the band heater itself. Check for any signs of uneven heating, overheating, or abnormal noises. If you notice any issues, turn off the power immediately and troubleshoot the problem.
Step 7: Insulation (Optional but Recommended)
To improve the energy efficiency of the band heater, you can add insulation around the band heater and the cylindrical object. There are various types of insulation materials available, such as ceramic fiber insulation and fiberglass insulation. Wrap the insulation material around the band heater and secure it in place using tape or straps. This will help to reduce heat loss and improve the overall performance of the heating system.
Troubleshooting and Maintenance
Even with proper installation, band heaters may encounter some issues over time. Here are some common problems and their solutions:
- Uneven heating: This could be due to improper positioning, damaged heating elements, or poor electrical connections. Check the alignment of the band heater, inspect the heating element for any signs of damage, and ensure that the electrical connections are secure.
- Overheating: Overheating can be caused by incorrect voltage supply, insulation failure, or blocked ventilation. Check the voltage setting, inspect the insulation material, and make sure there is sufficient ventilation around the band heater.
- Short circuit: A short circuit can occur if the electrical connections are loose or if the insulation is damaged. Use a multimeter to check for short circuits and repair or replace any damaged components.
Regular maintenance is also essential to ensure the long - lasting performance of the band heater. Clean the band heater regularly to remove any dust or debris. Check the electrical connections periodically and tighten them if necessary. Replace any worn - out parts promptly.
Conclusion
Installing a band heater on a cylindrical object is a precise process that requires careful planning, attention to detail, and the right tools. By following the steps outlined in this blog, you can ensure a successful installation and optimal performance of your band heater.
As a band heater supplier, we are committed to providing high - quality products and excellent customer service. If you are in the market for band heaters for your industrial applications, we invite you to contact us for more information about our products and to discuss your specific requirements. Our team of experts is ready to assist you in choosing the right band heater for your needs and providing guidance throughout the installation process.
References
- "Industrial Heating Handbook" by Richard J. Boucher
- "Electric Heating Systems: Principles, Design, and Application" by John W. Mitchell