Hey there! As a cartridge heater supplier, I've seen my fair share of faulty cartridge heaters. Replacing a faulty cartridge heater might seem like a daunting task, but it's actually quite doable with the right know - how. In this blog, I'll walk you through the whole process step by step.
Step 1: Safety First
Before you start replacing a cartridge heater, safety should be your top priority. First off, turn off the power supply to the equipment that the cartridge heater is installed in. This will prevent any electrical shocks. You should also wear protective gloves and safety glasses. Cartridge heaters can get really hot, and the process of removal might involve sharp edges or debris.
Step 2: Identify the Faulty Cartridge Heater
Not all cartridge heaters look the same, and sometimes, it can be tricky to figure out which one is the culprit. Check the equipment's manual if you have it. It usually has a diagram that shows the location of all the cartridge heaters. If the manual isn't available, look for signs of damage. A burned - out cartridge heater might have a discolored appearance, or there could be visible cracks on its surface.


Step 3: Remove the Old Cartridge Heater
Once you've identified the faulty heater, it's time to remove it. Most cartridge heaters are held in place by a retaining nut or a bracket. Use the appropriate tools, like a wrench for nuts or a screwdriver for brackets, to loosen and remove these fasteners.
Be careful when pulling out the cartridge heater. Sometimes, it can be stuck due to heat expansion or debris. If it doesn't come out easily, don't force it. You can try using a gentle rocking motion while pulling. In some cases, a small amount of lubricant can help loosen it up.
Step 4: Measure and Select a Replacement
After removing the old cartridge heater, you need to measure its key dimensions. The most important ones are the length and the diameter. You can use a caliper for accurate measurements. Also, note the wattage and voltage requirements of the old heater. These details are crucial because you need to find a replacement that matches the specifications of the original one.
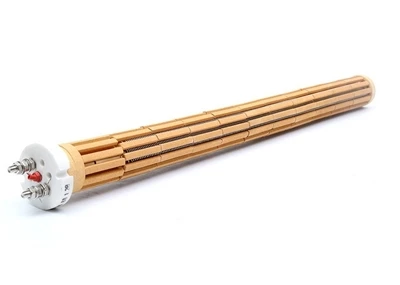
As a cartridge heater supplier, I can tell you that we offer a wide range of options. For example, the Fast Heat Cartridge Heater is a great choice if you need quick heating. And if you have specific requirements that off - the - shelf heaters can't meet, our Custom Cartridge Heater is the way to go.
Step 5: Install the New Cartridge Heater
Once you've got the right replacement, it's time to install it. First, make sure the mounting area is clean. Remove any debris or old insulation. Then, carefully insert the new cartridge heater into the opening. Make sure it fits snugly.
Next, re - attach the retaining nut or bracket. Tighten it just enough so that the heater is secure but don't over - tighten, as this could damage the heater or the equipment.
Step 6: Test the New Cartridge Heater
Before you put the equipment back into full operation, it's important to test the new cartridge heater. Turn on the power supply and monitor the temperature. Check if the heater is heating up as expected. You can use a temperature gauge to measure the temperature accurately.
If you notice any issues, such as the heater not heating at all or overheating, turn off the power immediately and double - check the installation. It could be that the heater is not installed correctly or there's a problem with the electrical connection.
Troubleshooting Tips
Sometimes, even after following all the steps, you might still encounter problems. Here are some common issues and how to fix them:
- No heat: Check the electrical connections. Make sure the wires are properly connected and there are no loose ends. Also, verify that the power supply is working.
- Overheating: This could be due to incorrect wattage or a problem with the thermostat. Check if the replacement heater has the right wattage. If the thermostat is faulty, it might need to be replaced.
- Uneven heating: This could be caused by poor contact between the heater and the equipment. Make sure the heater is installed tightly and there are no gaps.
Special Considerations for Different Applications
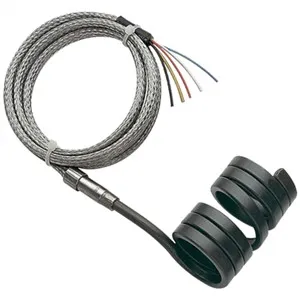
Cartridge heaters are used in a variety of applications, and each one might have its own special requirements. For example, in a Heating Tube For Mask No - Woven Machine, the heater needs to be able to provide consistent and precise heat.
When replacing a cartridge heater in such an application, make sure to follow the machine's specific guidelines. Some machines might require a certain type of insulation or a specific installation method.
Why Choose Our Cartridge Heaters
As a cartridge heater supplier, we take pride in offering high - quality products. Our heaters are made from top - notch materials, which ensures long - lasting performance. We also have a team of experts who can provide technical support if you have any questions during the replacement process.
Whether you need a standard heater or a custom - made one, we've got you covered. Our Fast Heat Cartridge Heater can quickly reach the desired temperature, which is great for applications where time is of the essence. And our Custom Cartridge Heater allows you to get a heater that perfectly fits your specific needs.
Contact Us for Your Cartridge Heater Needs
If you're in the market for a new cartridge heater or need more information about the replacement process, don't hesitate to get in touch. We're here to help you find the right solution for your application. Whether you're a small business or a large industrial operation, we can provide the products and support you need.
References
- General knowledge from years of experience as a cartridge heater supplier.
- Technical manuals of various cartridge heater - equipped equipment.