Upgrading an old ceramic heater can significantly enhance its performance, energy efficiency, and safety. As a reputable ceramic heater supplier, we understand the importance of getting the most out of your heating equipment. In this blog post, we'll guide you through the process of upgrading your old ceramic heater, step by step.
Why Upgrade Your Old Ceramic Heater?
Before diving into the upgrade process, let's understand why upgrading your old ceramic heater is a wise decision. Over time, ceramic heaters can experience wear and tear, leading to reduced efficiency, uneven heating, and potential safety hazards. Upgrading can address these issues, providing several benefits:
- Improved Energy Efficiency: Newer ceramic heater models are designed with advanced technology that consumes less energy while providing the same or better heating performance. This can lead to significant cost savings on your energy bills.
- Enhanced Safety Features: Modern ceramic heaters come equipped with safety features such as overheat protection, tip-over switches, and cool-touch exteriors, reducing the risk of accidents and fires.
- Better Heating Performance: Upgraded heaters often have more powerful heating elements and improved airflow, resulting in faster and more even heating throughout the room.
- Longer Lifespan: By replacing worn-out components and upgrading the heater's technology, you can extend its lifespan and avoid the need for frequent replacements.
Step 1: Assess the Condition of Your Heater
The first step in upgrading your old ceramic heater is to assess its current condition. Check for any visible signs of damage, such as cracked ceramic elements, frayed wires, or loose connections. If you notice any significant damage, it may be necessary to replace the heater entirely. However, if the damage is minor, you may be able to upgrade specific components to improve its performance.
Step 2: Research Upgrades and Replacement Parts
Once you've assessed the condition of your heater, it's time to research upgrades and replacement parts. Look for components that are compatible with your heater's make and model. Some common upgrades and replacement parts for ceramic heaters include:
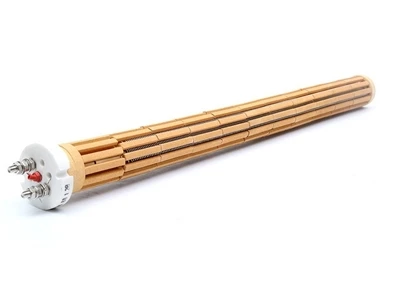
- Heating Elements: Over time, heating elements can wear out and lose their efficiency. Replacing the heating element can significantly improve the heater's performance. You can find a variety of heating elements online or at your local hardware store. For example, our Ceramic Radiant Tube Furnace Heater is a high-quality option that can provide efficient and reliable heating.
- Thermostats: A faulty thermostat can cause your heater to overheat or not reach the desired temperature. Upgrading to a new thermostat can ensure accurate temperature control and improve energy efficiency.
- Fans: The fan in your heater helps distribute warm air throughout the room. If the fan is noisy or not working properly, replacing it can improve the heater's airflow and heating performance.
- Safety Features: Consider upgrading your heater with additional safety features, such as overheat protection and tip-over switches. These features can provide peace of mind and reduce the risk of accidents.
Step 3: Gather the Necessary Tools
Before you start upgrading your heater, gather the necessary tools. You'll typically need a screwdriver, pliers, wire cutters, and a multimeter to test electrical connections. Make sure you have all the tools on hand before you begin the upgrade process.
Step 4: Disconnect the Heater
Before working on your heater, make sure it is unplugged from the power source. This will prevent any electrical shocks or accidents. If your heater is hardwired, turn off the circuit breaker that supplies power to the heater.
Step 5: Remove the Old Components
Once the heater is disconnected, carefully remove the old components that you plan to replace. Use the screwdriver to remove any screws or fasteners holding the components in place. Take note of how the components are connected and labeled, as you'll need to reinstall the new components in the same way.
Step 6: Install the New Components
Install the new components according to the manufacturer's instructions. Make sure all connections are secure and properly tightened. Use the multimeter to test the electrical connections and ensure they are working correctly.
Step 7: Reassemble the Heater
After installing the new components, reassemble the heater. Replace any screws or fasteners that you removed earlier. Make sure all parts are properly aligned and secured.


Step 8: Test the Heater
Once the heater is reassembled, plug it in and turn it on. Test the heater to make sure it is working properly. Check the temperature settings and make sure the heater is heating evenly. If you notice any issues, such as strange noises or a lack of heat, turn off the heater and double-check your installation.
Step 9: Maintain Your Upgraded Heater
To ensure the longevity and performance of your upgraded heater, it's important to maintain it regularly. Clean the heater's filters and vents to prevent dust and debris from accumulating. Check the electrical connections periodically to make sure they are secure. If you notice any issues with the heater, such as a decrease in performance or unusual noises, have it inspected by a professional.
Conclusion
Upgrading an old ceramic heater can be a cost-effective way to improve its performance, energy efficiency, and safety. By following the steps outlined in this blog post, you can upgrade your heater with confidence and enjoy the benefits of a more efficient and reliable heating system. If you have any questions or need assistance with upgrading your ceramic heater, please don't hesitate to contact us. We're here to help you find the best solutions for your heating needs.
References
- Manufacturer's manuals for ceramic heaters
- Online resources on ceramic heater upgrades and maintenance