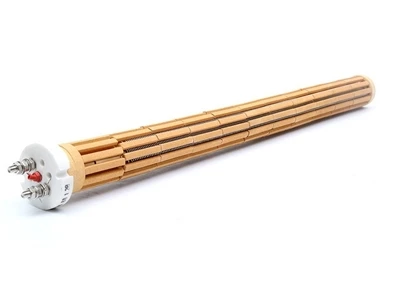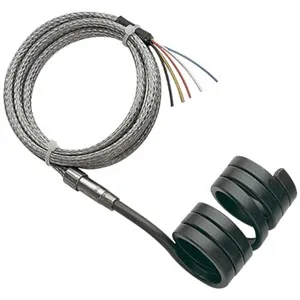
Testing cartridge heaters is a critical step in the manufacturing process, which not only guarantees customer satisfaction but also maintains the reliability of our supplies. In this blog, I will share how to test a cartridge heater effectively.


Initial Visual Inspection
Before conducting any electrical tests, a thorough visual inspection is essential. Carefully examine the cartridge heater for any visible signs of damage, such as cracks, dents, or loose connections. Cracks on the sheath can expose the internal heating elements, which can lead to short - circuits and potential safety hazards. Dents may affect the heater's thermal performance, as they can disrupt the heat transfer path. Loose connections, whether it's at the terminals or the wiring, can cause electrical instability.
For instance, our Electric Rod Resistance Heating Element is designed with a high - quality sheath to ensure durability. A simple visual check can quickly identify any issues that might have occurred during transportation or handling.
Resistance Testing
Resistance testing is a basic yet crucial part of cartridge heater evaluation. To perform this test, you will need a multimeter. Set the multimeter to the resistance (ohms) setting. Connect the two probes of the multimeter to the power leads of the cartridge heater.
The expected resistance value can be calculated using Ohm's Law ((R=\frac{V^{2}}{P})), where (R) is resistance, (V) is the rated voltage of the heater, and (P) is the rated power. For example, if you have a 24V Cartridge Heater For 3D Printer with a rated power of 100W, the expected resistance (R=\frac{24^{2}}{100}=5.76) ohms.
If the measured resistance is significantly higher or lower than the calculated value, it indicates a problem. A higher resistance might mean a broken heating element, while a lower resistance could suggest a short - circuit.
Insulation Resistance Testing
Insulation resistance testing helps to determine the integrity of the insulation material inside the cartridge heater. This is important for safety reasons, as a compromised insulation can lead to electrical leakage.
Use an insulation resistance tester (megohmmeter). First, make sure the cartridge heater is disconnected from the power source. Connect one lead of the megohmmeter to the heater's sheath and the other lead to one of the power leads.
The insulation resistance should be very high, typically in the range of several megohms. A low insulation resistance value indicates that the insulation has been damaged, which can be caused by moisture ingress, overheating, or physical damage to the heater. Our Stainless Steel Cartridge Heater features a high - quality insulation material to ensure long - term safety and performance.
Dielectric Strength Testing
Dielectric strength testing is used to verify the ability of the insulation to withstand high - voltage stress without breaking down. This test is more rigorous than insulation resistance testing.
A dielectric strength tester is required for this procedure. Connect the tester to the heater's power leads and the sheath. Apply a specific test voltage (usually higher than the rated operating voltage) for a set period, typically one minute.
If there is any breakdown of the insulation during the test, a current will flow between the power leads and the sheath, and the tester will indicate an electrical fault. This test is especially important for cartridge heaters used in high - voltage applications, such as Cartridge Heater For Die Mold Heating.
Thermal Performance Testing
Testing the thermal performance of a cartridge heater is key to ensuring that it meets the application requirements. This can be done using a temperature sensor, such as a thermocouple.
Install the cartridge heater in a test fixture that closely simulates the actual operating environment. Attach the thermocouple to the surface of the heater or the medium being heated. Connect the thermocouple to a temperature recorder.
Power on the heater and monitor the temperature change over time. The heater should reach the desired temperature within a reasonable time frame and maintain a stable temperature. Compare the actual temperature profile with the expected performance. If the heater fails to reach the set temperature or shows significant temperature fluctuations, it may have a problem with its heating efficiency or control mechanism.
Cyclic Testing
Cyclic testing involves repeatedly turning the cartridge heater on and off to simulate real - world usage conditions. This test helps to identify any potential issues that may arise due to thermal expansion and contraction.
Set up a test cycle where the heater is powered on for a specific period and then turned off for another period. The cycle should be repeated a sufficient number of times, usually hundreds or thousands, depending on the expected lifespan of the heater.
During cyclic testing, continuously monitor the heater's resistance, insulation resistance, and temperature. Any significant changes in these parameters over the test cycles indicate potential problems with the heater's durability. Our Flange Cartridge Heater With Metal Braided Wire is designed to withstand repeated cycling for long - term reliability.
Conclusion
Testing cartridge heaters is a comprehensive process that involves multiple aspects, from simple visual inspections to complex thermal and electrical testing. By performing these tests, we can ensure that our cartridge heaters meet the highest quality standards and provide reliable performance in various applications.
If you are in the market for high - quality cartridge heaters, please feel free to contact us to discuss your specific requirements. We are committed to providing you with the best products and services.
References
- ASM International. Handbook Committee. (2004). ASM Handbook, Volume 6: Welding, Brazing, and Soldering. ASM International.
- Easa, S. M. (2004). Electrical Machinery and Transformers. McGraw - Hill Education.