Oct 02, 2023
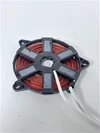
The electrical connection to a flange heater is a critical aspect of its installation. It must be done correctly to ensure safe and efficient operation.
1. Turn Off Power Supply:
- Before beginning any electrical work, make sure the power supply to the flange heater is completely turned off. Disconnect or lock out the power source to prevent accidental energization during the installation process.
2. Verify Voltage and Wattage:
- Ensure that the electrical supply voltage matches the voltage rating of the flange heater. Also, confirm that the wattage of the heater is suitable for the intended application.
3. Wire Selection:
- Use appropriately sized electrical wires and cables that can handle the current and voltage requirements of the flange heater. Consult the manufacturer's specifications for guidance on wire size.
4. Cable Glands and Conduit:
- Install cable glands or conduit connectors on the entry points of the electrical cables into the electrical enclosure or terminal box of the flange heater. This helps provide a secure and watertight seal to prevent moisture ingress.
5. Connect the Wires:
- Connect the electrical wires from the power source to the terminal connections on the flange heater. Most flange heaters have terminal blocks or studs for this purpose.
- Observe proper polarity if applicable; some flange heaters may have specific wiring requirements.
6. Secure Connections:
- Tighten the terminal screws or nuts securely to ensure a firm electrical connection. Use the recommended torque values provided by the manufacturer to prevent over-tightening, which can damage the terminals.
7. Grounding:
- Ensure that the flange heater is properly grounded. Connect the grounding wire to the designated grounding terminal or lug provided by the manufacturer.
8. Insulation and Protection:
- After making the connections, insulate the terminal connections using appropriate insulating materials, such as heat-resistant electrical tape or heat shrink tubing, to prevent electrical shorts or moisture penetration.
9. Seal and Protect:
- Seal the cable gland or conduit connections with suitable sealing compounds or materials to maintain the enclosure's integrity and prevent moisture or dust ingress.
10. Install Enclosure Cover:
- If the flange heater has an electrical enclosure or terminal box, securely fasten the cover to protect the electrical connections and components.
11. Inspect and Test:
- Perform a thorough visual inspection to ensure that all electrical connections are correctly made and insulated. Check for loose wires or damaged insulation.
- Conduct an electrical continuity test and insulation resistance test to verify the integrity of the electrical connections and insulation.
12. Power On and Monitor:
- Once the electrical connections have been verified, you can safely turn on the power supply. Monitor the flange heater's operation to ensure it heats the medium as intended and maintains the desired temperature.
It's essential to follow the manufacturer's installation instructions and any applicable electrical codes and regulations when connecting a flange heater. If you are not experienced with electrical installations, it is advisable to consult with a qualified electrician or technician to ensure that the connection is made safely and correctly. Additionally, always prioritize safety and follow safety precautions when working with electrical systems.
Previous: How do you calculate the power consumption of a flange heater?
Next: How are flange heaters used in the oil and gas industry?