Sep 29, 2022
How To Use Silicone 3D Printer Heated Beds? Detail instruction
We are talking about heated beds in particular after market silicon heated beds for your through any printer. I will discuss a number of safety measures the first safety measure that should be enabled regardless of your printer maker model regardless of the type of heated vegetation is still run a way protection in your print, they will run away protection can safeguard against the most common heater issues, including broken connectors, bad thermos stores, bad heater course, even like misaligned fans and enabling it showing a no brainer marlin hasn't enabled in most of its configurations, clipper also hasn't enabled by default.

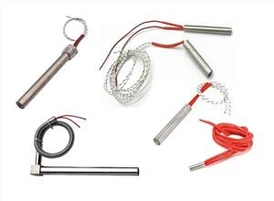
However, there are a number of manufacturerslike to talk about how most electrical heaters work. Most electrical heaters have a coil of wire that when current is run through it produces a lot of resistance that converts electricity into heat. That's how heated blankets, toaster oven, space heaters and 3D printer bed haters work and most stockade beds that quiz in the form of traces on the PCB or or lacquered tushie to villa. He been flexible traces press between two electrically insulating sheets of silicon. Now when you try to buy a silicone bed heater, they often advertise the size of the voltage and the wattage the size and shape is something that you cannot change. If you have, say, 330 millimeter bed, you may be inclined to get a more common, 350 millimeter heater and just trim off the edges, however, cutting or drilling holes to the bed will likely cut the coil, and some are all the bed will not heat and and you may even cause a fire. So by the size and shape you need upfront, you may be able to get away with the heater slightly smaller than your bed as the heat will dissipate to the edges, especially if you're sticking with an aluminum plate and putting on that as aluminum is a great conductor of heat, however, you can probably squeeze an extra centimeter or two around the edges, even on a glass bed, the next two variables are wattage and voltage, and those are two of the three variables in the electrical power formula, what age equals voltage times average? So what it is the measure of power, and in the case of the heated bed, the amount of heat generated by the bed within a margin of air, any bed with similar construction and wattage will heat about as fast as any other bed with similar construction and wattage,
Regardless of whether it's AC or DC or 12 or 110, 120 watt 12 heated bed will heat as fast as 121 hundred and 10 volt heat in bed. That's why you often see people suggesting larger power supplies and higher voltages for printer heated bets, you can get a lot more wattage with a lot less average, which means a lot less heat and stress and a lot less danger when you double voltage from a 12 opsu to a 24 volt PSU, you have the average needed to meet a given wattage. When you move from 12 votes to 110 volt mains power, you cut that average almost tenfold. So now we understand the relationship between volts and watts. But what does it mean from a practical perspective? How much wattage do you really need to meet your printing goals? Well, I took some benchmarks from the 400 millimeter 24 om aluminum bed that came with the travesty X 5 sa. I also had a 300mm, 220 watt, silicon heated bed and a 400mm, 110 double AC 700 watt silicon heated bed, keep in mind that each step up is a jump in both cost and complexity. Now, before we get into the specifics of how each bedtime is wired, you will see that all of my wiring diagrams start with the fuse and the switch coming off the mains power of use on the mains power is always a good idea, and it's very simple to add if you don't already have one a lot of prayers use the same cable connector with the buildings, which infuse and that's great. But if you don't make sure you have some kind of views on the hot side of your men's power.
Now the simple setup is gonna be running AC power to your power to your control award and then powering the bed off of the bed connectors directly on the control board. This set up is easy to understand, and it's it's hard to mess up. . So assuming you can put the wires in the right holes and don't short anything out, you should be good to go. The downside is the amount of power, the small switching circuitry on the board can handle is very limited if it's published at all, I've seen any Google data that indicates SK are words can support about sex apps that's about 72 watts on a 12 hour power supply for something cheaper like the chicken boards. I don't think I've tried anything over the OEM bored wattage. In addition to those limitations, pushing that average through the board adds heat and electrical noise potentially causing increased board errors in shortening board life. To route power around the board and directly from the PSU to the bed heater will employ electrical switching component called a MOSFET when the control board thinks it's heating the bed, it's really triggering the MOSFET, which will then switch power to the bed. The switching happens really fast, so you can still use pwm and get precise control over bed temperatures, And wiring a MOSFET is pretty straight for the DC in terminals are clearly marked. The hot bed terminals are clearly marked and keep in mind, they have no prior to lead on either connecter is fine and finally the control circumscription now just to clarify a MOSFET is actually a specific electrical component at the center of this three printing MOSFET package. It's surrounded by heat sinks and resistors and diodes and other components to make the installation as simple and safe as possible for 3D printers.
Now a MOSFET is a great option to get around the deficiencies of control board switching electronics, however, you are still bound by the limitations of the PSU. You're connecting it to, you have to account for the wattage of everything connected to that PSU, which includes all the stars your hot end and heat your cartridges and the rest of the printer fans and electronics. And that can be a hundred watches, so on and so on. You need to make sure the total wattage of all devices connected to the PSU is less than the reading of the PSU and preferably less than 80% of that rating, or you can step up to our next more complicated option at a dedicated PSU. Now in this option, we had a second PSU dedicated to the heated bed and unencumbered by the draw of the Components, As long as your heated bed draws less than the PSU is rated wattage, again, preferably less than 80% of the rated wattage, you should be good to go. In fact, you could use a more powerful 24 vote PSU for a bet on a 12 or printer as most MOSFET support, both voltages and upwards of 20 or 20:5 AMS.
Now in this option, we need the control board alone, but why are the MOSFET DC in to the dedicated PSU the control board provides the control circuit as before, but the bed is now drawing from the dedicated PSU that 24 vote PSU is commonly go up to 315 and sometimes even 500 watts and that can drive a pretty beefy heater. But if you want real power, you're gonna need to step up to AC mains. Voltage is that's 110 volts here in the states and 220 in much of Europe. Now, most circuits in the us are rated for 15 apps, which will give you up to 1650 watts or even twenty 200 watts. If you have a more powerful 20th circuit, and that's a lot of heat very quickly. Now for DC voltage is we used a MOSFET for AC, we're going to use an ssr or solid state relay and weighing on ssr is a little more complicated than wiring a MOSFET first while a MOSFET had terminals for a positive and negative DC voltage on both the input and bed sides and ssr only has a single switch terminal pair with the control circuit is closed. It bridges the terminals, you should always put the ssr on the hotline to limit the exposure of a short circuit when the bed is not heating, the neutral line runs right past the ssr and directly to the bed heater, there is no immediate catastrophe at the neutral line shorts to ground. Now that brings us to two other important safety precautions when working with an AC heated bed first, we still have a fuse in the load line with the bend. This is an independent AC circuit. It needs a fuse. Second, we move on AC voltage only to this more than power switch. And then it immediately terminates at the PSU. There's minimal risk of AC voltage shorting to the printer frame or to the heated bed. When we run acf 2 moving parts, the risk of shorting to the frame or the bed goes up significantly. It's a very good idea to wire AC ground to the exposed metal of the printer frame.

Now you want to ensure that you're connecting to bare metal, not any kind of coating or paint or whatever may be covering your exclusions DX by the sa has like this ideal screw connection that connects directly to the interior of the aluminum rods. It's perfect for a ground connection. Now, you should obviously make sure all of your EC connections are secure and insulated, of course, but running to the frame is just a little more assurance that you're not grabbing 110 volts when you grab the frame. And finally, unlike a mosque that the ssr trigger circuit is polarized, You have to be sure to connect the positive, then trigger voltage to the positive input terminal and the negative bed jitter voltage to the negative input terminal. If you give those backwards, the ssr may feel the clothes or even hold the circuit closed, even when there's no voltage across the input. So now here we are. We got fuses on the road wire check. the polarity of the control circuit is correct check, our frame is grounded, check were were all good, right? Well, mostly the thing with MOSFET is that when they are overloaded or damaged, usually the fed itself blows up or the the triggering circuitry is damaged in such a way that the circuit is left open and your bed is off, however, with an ssr generally when they overload their stuffed closed and the bed is left heating combine that with like a CD under market of cheat me straight edestin Airey O in which are heated bed just keeps heating and heating and heating until it melts are are worse and since this is a hardware failure, only one way protection actually offers no protection in this situation. So what to do?
First, you should buy an overbuilt ssr from a reputable company. I I'm using a 40 APP ssr from up sell, uh where the draw of my bed is only about 6.5 ants.
And second, you need to ensure that your ssr is appropriately heat sink. Now, 48 ssr with the six and draw likely should require any passive or active cooling. However, I still secured it to the mental power supply frame to act as a heat sink. And
finally, you should consider using a thermal fuse as even over built name, brand ssr can still fail. A 3rd refuse acts just like a normal views, however, instead of blowing when there's too much powers pump through it, a thermal fuse of blow, when the temperature gets too high, as with the regular fuels you want the thermal fuse on the hotline and the fees will need to be positioned as close to the bed heater as possible. Now some people use the screwing type and and tap a hole into the the aluminum plate itself.

However, barrel pipes are cheaper and easier to get here in the United States. And it it fits well within like my bed sandwich, you just have to be sure to insulate the Leeds very, very well and personally I have a second safeguard against her runaway debt. My partner reports its temperatures to home assistant. It's it's a Free automation hub. If homocysteine detects the overheat scenario, it will kill the smart switch that the printer is connected to. So now a lot of people print directly on their aluminum plate that came with the premium, um, and you know maybe with like I've been surfaced up to it or something like that. Uh, and for those people just peeling off the sticking backing of the silicon heated bed and slapping it on the bottom, uh, that might be fine. However, I print on glass and I don't have as much trust in the three and adhesive as others might have, especially when it's heating to a hundred degrees and 110 volts are pumping through it. I prefer to have my mat supported on the bottom. Now, unfortunately, silicone heat maps are only flat on the Top side. Uh, they have these power and thermometer leads wired to the middle of the bed, including this big obnoxious hump through the middle. So I purchased court tiles to use as an insulation buffer layer, I cut a channel out of the court for the wires as well as for the thermal fuse. And I made sure to cover the aluminum in high tech kept on tape just in case something does run through an insulation layer, then you can just put the PAD on the Cork, the glass on the PAD, everything is snug, click that whole mess together, and you're done.
Now that if that's all wired up, it's a good idea to take a look at table screen now, regardless of whether you have a nice style print with the constantly moving bed or a cube style printer, where the bed just moves up and down, you still need to ensure that there is more than just sort of holding the bed heater wires and place now some prisoners account for this right out of the box. Uh, but if not, you may need to come up with something customized to print on the X 5 sa. There's this the short static run to the bed cable chain, and a little velcro does the trick on the ft 5 I had to print this little strain relief stand to keep strain off the saddle joint. Installed uh you're ready to go, you should be able to set a temp in your favorite tool and watch the temps rise, um, but your control board probably has stored the pit settings from your old bed, so you might see some odd heating behavior, especially once the target temp is made, and it's just trying to maintain uh you want to pit tunes such a new bed is likely very different from the old one you're replacing, but it's a simple set of commands in marlin or clipper, however, eating weird 3rd party from where should have some way of tuning Heping running tuning and saving the things will just how quickly power switch to the heaters and reduced the bounce around the target temperature. So now you're installed your tune, you should be ready to print on your new.
Previous: Why Choose Silicone Rubber Heaters?
Next: Silicone heating pads used in the field of medical equipment